Building and Running Apache Shindig for Java
This is the Java steps on how to build and run Apache Shindig.
- Prequisites
- Get the code
- Build and run the code (with Maven)
- Setting up an Eclipse project
- Generating Code Coverage in Eclipse
- Running inside Eclipse
- Running with Caja
Prequisites before building Apache Shindig
In order to build Apache Shindig, you must have the following:
- Java (JDK/JRE) 1.5 or later installed on your system and the JAVA_HOME environment variable set.
- See: http://java.sun.com/ for installation instructions.
- A Subversion client installed in order to checkout the code.
- Instructions for downloading and installing Subversion can be found here: http://subversion.tigris.org/
- Apache Maven installed to perform the build.
- Instructions for downloading and installing Maven can be found here: http://maven.apache.org/download.html
Getting the code
Create a subdirectory and checkout the Apache Shindig code from its Subversion repository
- mkdir ~/src/shindig (or wherever you'd like to put it)
- cd ~/src/shindig
- svn co http://svn.apache.org/repos/asf/shindig/trunk/
Building and running the code with Maven
To build a Web Archive (WAR) file for the Gadget server and run tests, perform the following:
- Make sure you have the prerequisites installed first.
- cd ~/src/shindig/
- mvn
- Once the build successfully completes, you can install the built WAR files located in the /target subdirectory onto your JEE server.
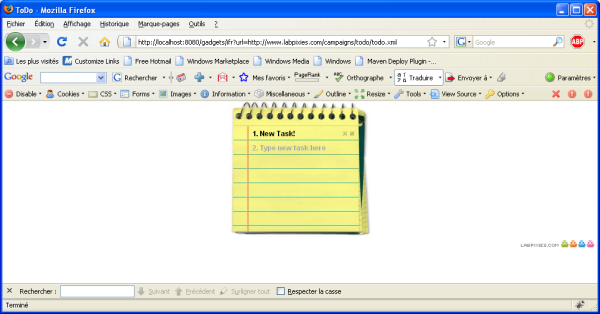
To run the code and start a Jetty server that will run on at localhost:8080:
- mvn -Prun
- Open in you browser http://localhost:8080/gadgets/ifr?url=http://www.labpixies.com/campaigns/todo/todo.xml
To run the Jetty server on a different port, use:
- cd java/server
- mvn clean install jetty:run -DrunType=
Once you've either installed the WAR file on your JEE server, or are running locally using the Jetty server, you can test the Gadget server using:
- http://localhost:
/gadgets/ifr?url=http://www.labpixies.com/campaigns/todo/todo.xml
Setting up an Eclipse development environment
- Download and unzip the Eclipse IDE for Java EE Developers from the Eclipse downloads page. At the time that this tutorial was written Eclipse Indigo is the current release.
- Download and unzip Apache Maven from the Maven downloads page. At the time that this tutorial was written Maven 3.0.3 is the current release.
- Download and unzip Apache Tomcat from the Tomcat downloads page. At the time that this tutorial was written Tomcat 7.0.23 is the current release.
- Download and unzip the Eclipse Subversive update site from the Eclipse Subversive downloads page. The version you download depends on the version of Eclipse you have installed. Make sure you download the correct version.
- Start Eclipse.
- Select a workspace you would like to use for your development.
- Once Eclipse has started close the Welcome page.
- Go to Help -> Install New Software
- In the Install dialogs "Work With" field select "All Available Sites" from the drop down. It may take a bit to get all the update sites.
- In the filter field type Maven.
- Select m2e - Maven Integration For Eclipse. There may be more than one entry for this plugin, just select one and click Next.
- Select Next on the Install Details dialog.
- Accept the license agreements and click Finish.
- After the installation finishes, you will be prompted to restart Eclipse, select Not Now.
- Go to Help -> Install New Software again.
- Select Add to add a new update site.
- Select Local on the Add Repository dialog.
- Navigate to the Eclipse subversive update site you downloaded and unzipped earlier in step 4 and select Open.
- Give the update site and name, such as Subversive, and select OK to the Add Repository dialog.
- Select all the categories in the update site and click Finish. At the time that this tutorial was written there was 3 categories Subversive Integration Plug-ins, Subversive Sources, Subversive SVN Team Provider Plugin.
- Select Finish on the Install Details dialog.
- After the install finishes you will be prompted to Restart Eclipse, select Restart Now.
- After Eclipse restarts you will be prompted to install and SVN Connector. Select the latest SVN Kit Connector and select Finish on the install dialog. At the time that this tutorial was written the latest connector was SVN Kit 1.3.5.
- At the Install dialog make sure all the plugins are selected and select Next.
- Select Next to the Install Details dialog.
- Accept the licenses, and click Finish.
- If you get any security warnings, click OK.
- Once the installation finishes you will be prompted to restart Eclipse, click Restart Now.
- Once Eclipse restarts close the Welcome view.
- Open Eclipse Preferences (On Mac Eclipse -> Preferences, on Windows Help -> Preferences)
- Go to Maven -> Installations and select Add.
- Browse to the Apache Maven installation you unzipped in step 2 and select Open.
- This should add an external Maven installation, make sure it is selected and press Apply.
- In the preferences dialog navigate to Maven -> Discovery and select Open Catalog.
- In the m2e Marketplace dialog's Find field type "Subversive", and select m2e - subversive SCM Handler and click Finish.
- On the Install dialog make sure Maven SCM Handler for Subversive is selected and click Next.
- On the Install Details dialog select Next.
- Accept the license agreements and select Finish.
- If you get any security warnings, click OK.
- The installation will probably happen in the background, but after it is done a restart dialog will pop up, select Yes to restart Eclipse.
- Once Eclipse restarts go to Window -> Open Perspective -> Other... -> SVN Repository Exploring and select OK.
- In the SVN Repositories View select the New Repository Location icon.
- In the New Repository Location dialog enter the URL to the Shindig SVN repository. You can find the URL here. At the time that this tutorial was written the URL is http://svn.apache.org/repos/asf/shindig. (Use https if you are a Shindig committer.)
- Once the repository is added you should see it listen in the SVN Repositories view. Expand the Shindig SVN Repository and right click on trunk. Select Checkout as Maven Project.
- In the Checkout as Maven project from SCM dialog select Finish.
- Trunk will be checked out in the background. While that is happening go to Window -> Open Perspective -> Java.
- After trunk is checked out an Import Maven Projects dialog should popup. Make sure all the projects are selected and select Next
- On the Setup Maven plugin connectors dialog select Finish. (There may be some errors on this dialog, like yuicompressor, this is OK)
- An Install dialog will popup to install more m2e Connectors, select all the plugins in the dialog and select Next.
- On the Install Details dialog select Next.
- Accept the licenses and select Finish
- If you get a Security Warning dialog, select OK.
- After the installation finishes you will be prompted to restart Eclipse, click Yes.
- After the clean finishes right click on shindig-project and select Run As -> Maven Build...
- On the resulting screen type "clean install" into the Goals field and "all,samples,reporting" into the Profiles field. This will mimic the builds that happen via Jenkins on builds.apache.org. For more information on building with Maven, please see the Maven documentation.
- After the build finishes there will be a web app in
/shindig-project/java/server/target/shindig-server- -SNAPSHOT - In Eclipse go to Window -> Show View -> Other... -> Server -> Servers.
- Right click in the Servers view and select New -> Server.
- Expand Apache and select Tomcat v7.0 Server. Select Next.
- Click Browser and navigate to the directory you extracted the Apache Tomcat zip to in step 3 and select Open. Click Finish.
- Double click on the Tomcat server in the servers view and select the Modules tab.
- Click the Add External Web Module... button.
- In the Add Web Module dialog select Browse and navigate to the web app generated from the build in,
/shindig-project/java/server/target/shindig-server- -SNAPSHOT and select Open. - Click OK to the Add Web Module dialog and save the Web Module changes.
- Click the Tomcat server in the server view and select the Debug icon.
- Open a browser and navigate to http://localhost:8080/samplecontainer/examples/commoncontainer/index.html and render some gadgets!
Generating Code Coverage in Eclipse
To generate code coverage statistics inside of Eclipse, install the EclEmma plugin. Then
- "Using eclipse external tools"
- "Attaching to the server running in debug mode, using eclipse"
Note: You must have set up Eclipse to build the code or do mvn package yourself after making changes, but you won't need to restart Jetty to see your changes.
Running with Caja
Caja is an important part of OpenSocial that greatly enhances JavaScript security. Caja is managed in a separate open source project hosted by Google code projects. For more information on Caja, see: http://code.google.com/p/google-caja/wiki/CajaEasyIntro
- Load this page: http://localhost:8080/samplecontainer/examples/commoncontainer/index.html
- Point it to this gadget: http://localhost:8080/gadgets/files/samplecontainer/examples/SocialHelloWorld.xml
To see the cajoled code (Firefox only), right-click inside the iframe and do "This Frame -> View Frame Source"
Additional reading
Read java/README for original instructions on how to start up any of the java shindig servers.
Read javascript/README for instructions for using the Apache Shindig Gadget Container JavaScript to enable your page to render Gadgets using gmodules.com or a server started up as described above.